In Sweden, Pepparkakor (also called Gingersnaps or Ginger Thins) are a traditional Christmas treat.
The Pepparkakor usually are cut in the shape of little men and women, pigs, or hearts. Sometimes, they are decorated with frosting.
Pepparkakor also are eaten year round. Although if it's not Christmastime, they usually are not homemade and are just round in shape.
In Sweden, it is customary to place the Pepparkakor in the palm of your hand and make a wish. Then, using the index finger or thumb of your other hand, tap the cookie in the middle. According to Swedish tradition, if the Pepparkakor breaks into three pieces, your wish will come true.
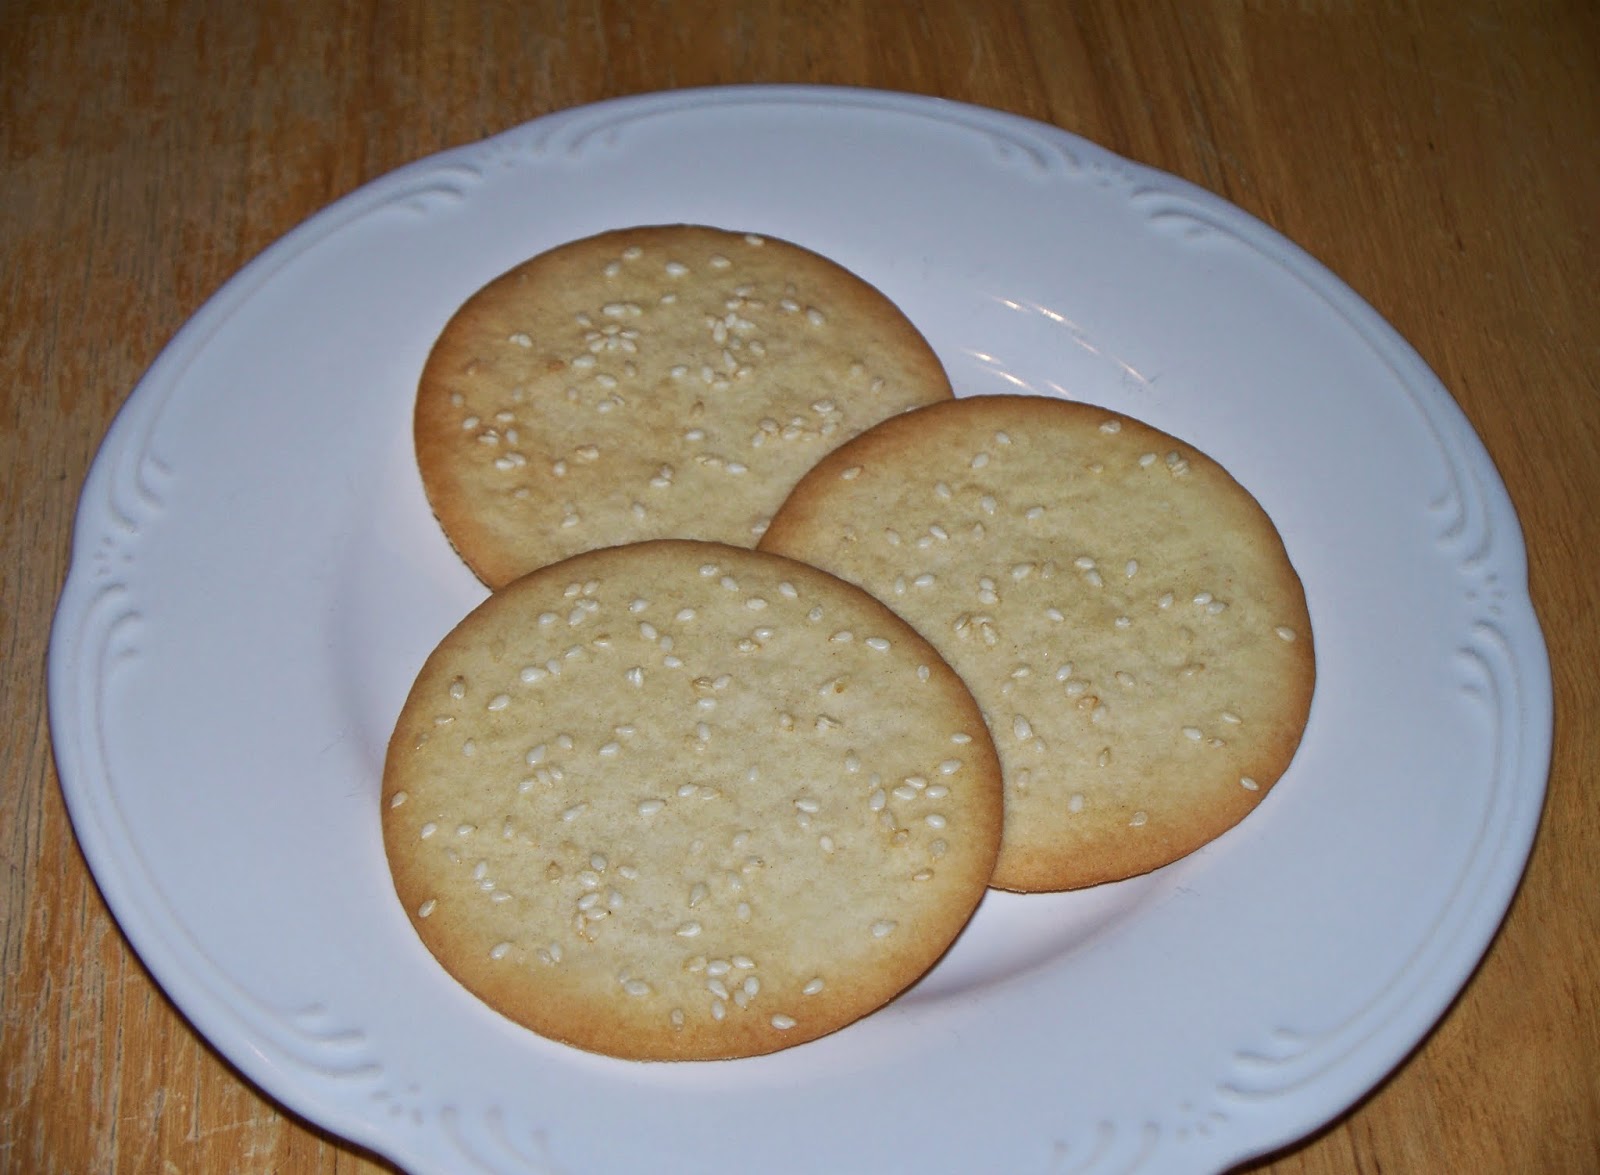
I intended to make Pepparkakor using one of the many recipes I found on the Internet. However, I ran out of time. So instead, I purchased Anna's Ginger Thins at Walmart.
They were quite delicious...although, not as yummy as homemade would have been, I'm sure! ;9 Sometimes, you just have to go with Plan B!
sources:
Sweden
A Cookie for Every Country
Walmart (photo)
Living with, Learning with, Laughing with, and Loving our special son with special needs.
Showing posts with label Christmas Around the World. Show all posts
Tuesday, December 23, 2014
Monday, December 22, 2014
Nanaimo Bar
I made Nanaimo Bar today.
The Nanaimo Bar is a dessert which requires no baking and is named after the west coast city of Nanaimo, British Columbia.
The exact origin of the Nanaimo Bar is unknown. The earliest confirmed printed copy of the recipe called "Nanaimo Bars" appears in a cookbook from 1953. However, the same recipe was published in the Vancouver Sun earlier that same year and called "London Fog Bar."
Legend dates the bars back to the 1930s when they were called "Chocolate Fridge Cake."
source: Wikipedia
Here is the recipe I used:
Melt butter, sugar, and cocoa in top of double boiler. Add egg and stir to cook and thicken. Remove from heat. Stir in crumbs, almonds, and coconut. Press firmly into ungreased 8x8-inch pan.
Second Layer:
1/2 cup unsalted butter
2 tablespoons and 2 teaspoons cream
2 tablespoons vanilla custard powder*
2 cups confectioners' sugar
Cream butter, cream, custard powder, and confectioners' sugar. Beat until light. Spread over bottom layer.
Top Layer:
4 1-ounce squares semi-sweet chocolate
2 tablespoons unsalted butter
Melt chocolate and butter over low heat. Cool slightly and pour over second layer.
Chill in refrigerator.
You can find the original version of this recipe here.
*Custard powder was created in Birmingham (a city in England, UK) by Alfred Bird in 1837, because his wife was allergic to eggs, the key ingredient used to thicken traditional custard. The product is a cornstarch-based powder which thickens to form a custard-like sauce when mixed with milk and heated.
source: Wikipedia
You can make your own custard powder or can find substitutes for custard powder. Here is a source I came across with information and directions for replacing custard powder.
I ordered Bird's Custard Powder from Amazon.
It shipped from the United Kingdom.
The Nanaimo Bar tastes delightful...and unlike anything I've tasted before!
Linked to:
Recipe of the Week
Best Recipes & DIY Projects
Titus 2 Tuesday
Family Fun Friday
The Nanaimo Bar is a dessert which requires no baking and is named after the west coast city of Nanaimo, British Columbia.
The exact origin of the Nanaimo Bar is unknown. The earliest confirmed printed copy of the recipe called "Nanaimo Bars" appears in a cookbook from 1953. However, the same recipe was published in the Vancouver Sun earlier that same year and called "London Fog Bar."
Legend dates the bars back to the 1930s when they were called "Chocolate Fridge Cake."
source: Wikipedia
Here is the recipe I used:
Nanaimo Bar
Bottom Layer:
1/2 cup unsalted butter
1/4 cup sugar
5 tablespoons cocoa
1 egg, beaten
1 1/4 cups graham cracker crumbs
1/2 cup finely chopped almonds
1 cup coconut
1/2 cup unsalted butter
1/4 cup sugar
5 tablespoons cocoa
1 egg, beaten
1 1/4 cups graham cracker crumbs
1/2 cup finely chopped almonds
1 cup coconut
Melt butter, sugar, and cocoa in top of double boiler. Add egg and stir to cook and thicken. Remove from heat. Stir in crumbs, almonds, and coconut. Press firmly into ungreased 8x8-inch pan.
Second Layer:
1/2 cup unsalted butter
2 tablespoons and 2 teaspoons cream
2 tablespoons vanilla custard powder*
2 cups confectioners' sugar
Cream butter, cream, custard powder, and confectioners' sugar. Beat until light. Spread over bottom layer.
Top Layer:
4 1-ounce squares semi-sweet chocolate
2 tablespoons unsalted butter
Melt chocolate and butter over low heat. Cool slightly and pour over second layer.
Chill in refrigerator.
You can find the original version of this recipe here.
*Custard powder was created in Birmingham (a city in England, UK) by Alfred Bird in 1837, because his wife was allergic to eggs, the key ingredient used to thicken traditional custard. The product is a cornstarch-based powder which thickens to form a custard-like sauce when mixed with milk and heated.
source: Wikipedia
You can make your own custard powder or can find substitutes for custard powder. Here is a source I came across with information and directions for replacing custard powder.
I ordered Bird's Custard Powder from Amazon.
It shipped from the United Kingdom.
The Nanaimo Bar tastes delightful...and unlike anything I've tasted before!
Linked to:
Recipe of the Week
Best Recipes & DIY Projects
Titus 2 Tuesday
Family Fun Friday
Friday, December 12, 2014
Panforte
I made Panforte today.
Panforte is a traditional Italian dessert containing fruits and nuts, resembling a fruitcake. Literally, panforte means "strong bread" which refers to the spicy flavor. A small wedge usually is served with coffee or a dessert wine after a meal; although, some Italians enjoy it with their coffee at breakfast.
The city of Siena is regarded as the Panforte capital of Italy. Documents from 1205 show that Panforte was paid to the monks and nuns of a local monastery as a tax or tithe which was due on February 7th that year. There are references to the Crusaders carrying Panforte with them on their quests, and to the use of Panforte in surviving sieges because of the confection's durability.*
Here is the recipe I used:
3 ounces semi-sweet chocolate, chopped
1/2 cup flour
1 tablespoon unsweetened cocoa powder
1 teaspoon cinnamon
1/4 teaspoon allspice
1 cup coarsely chopped hazelnuts, toasted
1 cup coarsely chopped almonds, toasted
1/2 cup candied orange peel
1/2 cup candied lemon peel
2/3 cup sugar
2/3 cup honey
Preheat oven to 300 degrees F.
Cut parchment paper to line an 8-inch tart pan that has a removable side. Butter the parchment paper.
Melt the chocolate in a double-boiler, and set aside.
In a large bowl, combine the flour, cocoa powder, spices, nuts, and candied fruits.
In a saucepan, stir together the sugar and honey. Place the saucepan over medium heat and bring to a boil, stirring until the sugar has dissolved. Continue to boil the mixture over medium heat, without stirring, until the temperature reaches 240 degrees F. (Use a candy thermometer to check the temperature.)
Remove from the heat source and stir the mixture and the melted chocolate into the dry ingredients. It will stiffen once combined, so quickly transfer the dough to the prepared pan. With damp hands or the back of a large spoon, press the dough in the pan and smooth the top.
Bake for 30-35 minutes or until the surface has fine blisters. Remove from the oven and place the pan on a wire rack to cool slightly. Remove the side of the pan and generously dust the top with confectioners' sugar while the Panforte is warm.
Once it has cooled completely, tightly wrap the Panforte in plastic wrap and store in a cool, dry place. When wrapped well, the Panforte will keep for several months.
Serve the Panforte in small wedges; it is quite rich!
Note that for this recipe I used the Candied Orange Peel and the Candied Lemon Peel I made! :)
The original version of this recipe came from a free Christmas cookbook, Figgy Pudding, Stollen and Tamales, from Knowledge Quest.
*source: Wikipedia
Linked to:
Best Recipes & DIY Projects
Tasty Tuesdays
Titus 2 Tuesday
Fun Food Friday
Family Fun Friday
Panforte is a traditional Italian dessert containing fruits and nuts, resembling a fruitcake. Literally, panforte means "strong bread" which refers to the spicy flavor. A small wedge usually is served with coffee or a dessert wine after a meal; although, some Italians enjoy it with their coffee at breakfast.
The city of Siena is regarded as the Panforte capital of Italy. Documents from 1205 show that Panforte was paid to the monks and nuns of a local monastery as a tax or tithe which was due on February 7th that year. There are references to the Crusaders carrying Panforte with them on their quests, and to the use of Panforte in surviving sieges because of the confection's durability.*
Here is the recipe I used:
Panforte
1/2 cup flour
1 tablespoon unsweetened cocoa powder
1 teaspoon cinnamon
1/4 teaspoon allspice
1 cup coarsely chopped hazelnuts, toasted
1 cup coarsely chopped almonds, toasted
1/2 cup candied orange peel
1/2 cup candied lemon peel
2/3 cup sugar
2/3 cup honey
Preheat oven to 300 degrees F.
Cut parchment paper to line an 8-inch tart pan that has a removable side. Butter the parchment paper.
Melt the chocolate in a double-boiler, and set aside.
In a large bowl, combine the flour, cocoa powder, spices, nuts, and candied fruits.
In a saucepan, stir together the sugar and honey. Place the saucepan over medium heat and bring to a boil, stirring until the sugar has dissolved. Continue to boil the mixture over medium heat, without stirring, until the temperature reaches 240 degrees F. (Use a candy thermometer to check the temperature.)
Remove from the heat source and stir the mixture and the melted chocolate into the dry ingredients. It will stiffen once combined, so quickly transfer the dough to the prepared pan. With damp hands or the back of a large spoon, press the dough in the pan and smooth the top.
Bake for 30-35 minutes or until the surface has fine blisters. Remove from the oven and place the pan on a wire rack to cool slightly. Remove the side of the pan and generously dust the top with confectioners' sugar while the Panforte is warm.
Once it has cooled completely, tightly wrap the Panforte in plastic wrap and store in a cool, dry place. When wrapped well, the Panforte will keep for several months.
Serve the Panforte in small wedges; it is quite rich!
Note that for this recipe I used the Candied Orange Peel and the Candied Lemon Peel I made! :)
The original version of this recipe came from a free Christmas cookbook, Figgy Pudding, Stollen and Tamales, from Knowledge Quest.
*source: Wikipedia
Linked to:
Best Recipes & DIY Projects
Tasty Tuesdays
Titus 2 Tuesday
Fun Food Friday
Family Fun Friday
Tuesday, December 9, 2014
Lebkuchen
Lebkuchen is a German Christmas treat, somewhat resembling gingerbread. Lebkuchen often is baked on a thin wafer base and sometimes is formed into all shapes and sizes; although, round is the most common shape. Traditionally, the cookies are quite large, sometimes measuring 4 1/2 inches in diameter.
Lebkuchen Hearts are inscribed with icing and are available at many German markets.
Lebkuchen crafted into fancy shapes sometimes is used as Christmas decorations.
Lebkuchen ranges in taste from spicy to sweet. There are many regional variations of Lebkuchen; however, the ingredients usually include honey, spices (such as allspice, aniseed, cardamom, cloves, coriander, and ginger), nuts (including almonds, hazelnuts, and walnuts), and candied fruits. Typically, it is glazed or covered with very dark chocolate.
Lebkuchen came to Aachen, Germany from Belgium in the 13th century, where it was baked in Franconian Monasteries. Lebkuchen bakers were recorded as early as 1296 in Ulm, and 1395 in Nuremberg.
The seasonings needed to bake Lebkuchen were not available locally and had to be imported. Because of this, Lebkuchen grew in popularity mainly in larger cities such as Ulm, Nuremberg, Cologne, and Munich that were situated on trade routes from the Orient.
In 1643, Nuremberg created the "League of Lebkuchen-Bakers." In 1645, the league created strict guidelines that commercial bakers had to follow in order to sell their Lebkuchen.
Nürnberger Lebkuchen is the most well-known worldwide. This Lebkuchen from Nuremberg is baked on a thin wafer and is known for its light, soft texture.
I baked Lebkuchen today.
Here is the recipe I used:
3/4 cup dark brown sugar
1 egg
4 tablespoons lemon juice, divided
2 cups flour
1/2 teaspoon baking soda
1/4 teaspoon salt
1 tablespoon allspice
1/2 cup golden raisins
1/2 cup finely chopped almonds
1/4 cup finely chopped candied orange peel
1/4 cup finely chopped candied lemon peel
1 tablespoon grated lemon zest
2 tablespoons milk
32 whole blanched almonds, toasted
1 1/2 cups powdered sugar
1 teaspoon vanilla
Heat honey and brown sugar over low heat, stirring constantly, until sugar dissolves and mixture is thin. Transfer mixture to a large bowl. Add egg and
1 tablespoon lemon juice; mix well.
In a small bowl, sift together flour, baking soda, salt, and allspice. Add to wet ingredients 1/2 cup at a time; mix well after each addition.
Combine raisins, chopped almonds, candied peels, and lemon zest. Add to dough mixture, and stir until all ingredients are combined.
Cover with plastic wrap, and refrigerate overnight.
Preheat oven to 350 degrees F.
Line two 9-inch square pans with heavy-duty aluminum foil. Butter foil in pans. Divide dough in half; press evenly into pans. Brush surface with milk. Bake for 25-30 minutes.
While warm, score each pan into 16 squares; press a whole almond into the center of each square. Combine powdered sugar, vanilla, and remaining
3 tablespoons lemon juice; brush evenly over bars.
Let cool completely before cutting. Store in tightly covered tin. Do not store in plastic bags.
Yield: 32 bars
Note that for this recipe I used the Candied Orange Peel and the Candied Lemon Peel I made! :)
You can find the original version of this recipe here.
sources:
Wikipedia
German Food Guide
A Cookie for Every Country
Flickr
Linked to:
Tasty Tuesdays
Titus 2 Tuesday
Fun Food Friday
Lebkuchen Hearts are inscribed with icing and are available at many German markets.
Lebkuchen crafted into fancy shapes sometimes is used as Christmas decorations.
Lebkuchen ranges in taste from spicy to sweet. There are many regional variations of Lebkuchen; however, the ingredients usually include honey, spices (such as allspice, aniseed, cardamom, cloves, coriander, and ginger), nuts (including almonds, hazelnuts, and walnuts), and candied fruits. Typically, it is glazed or covered with very dark chocolate.
Lebkuchen came to Aachen, Germany from Belgium in the 13th century, where it was baked in Franconian Monasteries. Lebkuchen bakers were recorded as early as 1296 in Ulm, and 1395 in Nuremberg.
The seasonings needed to bake Lebkuchen were not available locally and had to be imported. Because of this, Lebkuchen grew in popularity mainly in larger cities such as Ulm, Nuremberg, Cologne, and Munich that were situated on trade routes from the Orient.
In 1643, Nuremberg created the "League of Lebkuchen-Bakers." In 1645, the league created strict guidelines that commercial bakers had to follow in order to sell their Lebkuchen.
Nürnberger Lebkuchen is the most well-known worldwide. This Lebkuchen from Nuremberg is baked on a thin wafer and is known for its light, soft texture.
I baked Lebkuchen today.
Here is the recipe I used:
Lebkuchen
1 cup honey3/4 cup dark brown sugar
1 egg
4 tablespoons lemon juice, divided
2 cups flour
1/2 teaspoon baking soda
1/4 teaspoon salt
1 tablespoon allspice
1/2 cup golden raisins
1/2 cup finely chopped almonds
1/4 cup finely chopped candied orange peel
1/4 cup finely chopped candied lemon peel
1 tablespoon grated lemon zest
2 tablespoons milk
32 whole blanched almonds, toasted
1 1/2 cups powdered sugar
1 teaspoon vanilla
Heat honey and brown sugar over low heat, stirring constantly, until sugar dissolves and mixture is thin. Transfer mixture to a large bowl. Add egg and
1 tablespoon lemon juice; mix well.
In a small bowl, sift together flour, baking soda, salt, and allspice. Add to wet ingredients 1/2 cup at a time; mix well after each addition.
Combine raisins, chopped almonds, candied peels, and lemon zest. Add to dough mixture, and stir until all ingredients are combined.
Cover with plastic wrap, and refrigerate overnight.
Preheat oven to 350 degrees F.
Line two 9-inch square pans with heavy-duty aluminum foil. Butter foil in pans. Divide dough in half; press evenly into pans. Brush surface with milk. Bake for 25-30 minutes.
While warm, score each pan into 16 squares; press a whole almond into the center of each square. Combine powdered sugar, vanilla, and remaining
3 tablespoons lemon juice; brush evenly over bars.
Let cool completely before cutting. Store in tightly covered tin. Do not store in plastic bags.
Yield: 32 bars
Note that for this recipe I used the Candied Orange Peel and the Candied Lemon Peel I made! :)
You can find the original version of this recipe here.
sources:
Wikipedia
German Food Guide
A Cookie for Every Country
Flickr
Linked to:
Tasty Tuesdays
Titus 2 Tuesday
Fun Food Friday
Sunday, November 30, 2014
Champurradas
I made Champurradas today. Actually, I baked them today. I made the dough the other day and refrigerated it until today when I had time to bake.
Last spring, I exchanged several postcards (through a direct swap) with a man in Guatemala. Eight months later, when I decided to teach a Christmas Around the World unit, I contacted him. I explained to him that I was hoping to bake a dessert (cookies or a cake) typically made at Christmastime in Guatemala, and that I had chosen to bake Champurradas.
My first discovery regarding Champurradas:
First, he told me that Champurradas can be found any time in Guatemala...not just at Christmastime! Then, he suggested that I prepare their typical Ponche Navideño (Christmas Fruit Punch).
He provided this website for a recipe:
http://www.mejorweb.gt/receta-de-ponche-navideno/
He provided this website for a demonstration video:
https://www.youtube.com/watch?v=3TwEAabYVwA
He explained that his mom adds some sugarcane and papaya, and sometimes coconut and hibiscus (Jamaican rose tea). He said that it is "sooo good!!"
He went on to explain that instead of sugar, they use panela, which is what gives the punch its brown color.
I discovered the following about panela:
source: Wikipedia
My second discovery regarding Champurradas:
Originally, I thought Champurradas were a cookie...the kind one eats for dessert at the end of a lunch or supper meal. Since, I have discovered that Champurradas are a "cookie"...the kind one eats for breakfast, dunked in a morning cup of coffee!
My postcard-exchanging friend in Guatemala also said this about Champurradas:
"I really like to eat them with coffee. I never thought about Champurradas as
cookies!! But it's true!! hahaha! :D"
After baking and tasting Champurradas, I understand! :D They are large, crunchy, and not too sweet! (My husband commented that they taste like shortbread cookies, only not as sweet and not as buttery. I agree.)
They are delicious! In retrospect, I think I should have made them a little bigger (in diameter)...and possibly should have baked them a little longer? However, I am happy with my first attempt. :)
Here is the recipe I used:
4 cups flour
1 tablespoon baking powder
1/2 teaspoon salt
1/2 cup butter, softened
1/2 cup shortening
1 cup sugar
3 eggs
1 ounce sesame seeds (approximately 3 tablespoons)
Preheat the oven to 325 degrees F.
Sift together the flour, baking powder, and salt.
In a large bowl, cream the butter, shortening, and sugar. Add the eggs and mix thoroughly. Add the dry ingredients one cup at a time, and mix thoroughly after each addition.
Using a rolling pin, roll out the dough as thin as possible, dusting the rolling pin and surface with flour to prevent sticking. Cut circles using a 3 1/4 inch cookie cutter. Transfer to a cookie sheet lined with parchment paper. Sprinkle with sesame seeds, and press in lightly.
Bake for 10-12 minutes or until they begin to brown. Remove from the cookie sheet to a rack to cool.
Yield: approximately 3 1/2 dozen
You can find the original version of this recipe here.
P.S. Thank you, dear friend in Guatemala, for the insight! :)
Last spring, I exchanged several postcards (through a direct swap) with a man in Guatemala. Eight months later, when I decided to teach a Christmas Around the World unit, I contacted him. I explained to him that I was hoping to bake a dessert (cookies or a cake) typically made at Christmastime in Guatemala, and that I had chosen to bake Champurradas.
My first discovery regarding Champurradas:
First, he told me that Champurradas can be found any time in Guatemala...not just at Christmastime! Then, he suggested that I prepare their typical Ponche Navideño (Christmas Fruit Punch).
He provided this website for a recipe:
http://www.mejorweb.gt/receta-de-ponche-navideno/
He provided this website for a demonstration video:
https://www.youtube.com/watch?v=3TwEAabYVwA
He explained that his mom adds some sugarcane and papaya, and sometimes coconut and hibiscus (Jamaican rose tea). He said that it is "sooo good!!"
He went on to explain that instead of sugar, they use panela, which is what gives the punch its brown color.
I discovered the following about panela:
- Panela is unrefined whole cane sugar, which is a solid form of sucrose derived from the boiling and evaporation of sugarcane juice.
- Panela is sold in many forms, such as granulated, liquid, and solid blocks of different weights.
![]() |
| Panela |
source: Wikipedia
My second discovery regarding Champurradas:
Originally, I thought Champurradas were a cookie...the kind one eats for dessert at the end of a lunch or supper meal. Since, I have discovered that Champurradas are a "cookie"...the kind one eats for breakfast, dunked in a morning cup of coffee!
My postcard-exchanging friend in Guatemala also said this about Champurradas:
"I really like to eat them with coffee. I never thought about Champurradas as
cookies!! But it's true!! hahaha! :D"
After baking and tasting Champurradas, I understand! :D They are large, crunchy, and not too sweet! (My husband commented that they taste like shortbread cookies, only not as sweet and not as buttery. I agree.)
They are delicious! In retrospect, I think I should have made them a little bigger (in diameter)...and possibly should have baked them a little longer? However, I am happy with my first attempt. :)
![]() |
| Champurradas |
Here is the recipe I used:
Champurradas
4 cups flour
1 tablespoon baking powder
1/2 teaspoon salt
1/2 cup butter, softened
1/2 cup shortening
1 cup sugar
3 eggs
1 ounce sesame seeds (approximately 3 tablespoons)
Preheat the oven to 325 degrees F.
Sift together the flour, baking powder, and salt.
In a large bowl, cream the butter, shortening, and sugar. Add the eggs and mix thoroughly. Add the dry ingredients one cup at a time, and mix thoroughly after each addition.
Using a rolling pin, roll out the dough as thin as possible, dusting the rolling pin and surface with flour to prevent sticking. Cut circles using a 3 1/4 inch cookie cutter. Transfer to a cookie sheet lined with parchment paper. Sprinkle with sesame seeds, and press in lightly.
Bake for 10-12 minutes or until they begin to brown. Remove from the cookie sheet to a rack to cool.
Yield: approximately 3 1/2 dozen
You can find the original version of this recipe here.
P.S. Thank you, dear friend in Guatemala, for the insight! :)
Tuesday, November 25, 2014
Candied Lemon Peel
I made Candied Lemon Peel today...for the same reasons I made Candied Orange Peel last week!
I used the same recipe. The only difference I noticed was that it didn't seem to take as long for the Candied Lemon Peel to cook.
![]() |
| Drying |
![]() |
| Done! |
Sunday, November 23, 2014
Galletas de Mantequilla
I made Galletas de Mantequilla today.
Ring-shaped butter cookies like these are a popular holiday treat in Mexico. Typically, they are decorated with chocolate jimmies; however, red, white, and green nonpareils transform them into festive Christmas wreaths.
Here is the recipe I used:
In a bowl, whisk together the flour, baking powder, and salt.
In a large bowl, mix together the butter, sugar, and vanilla until fluffy. Add the yolks one at a time, mixing well after each addition. Mix in the dry ingredients.
Chill the dough for 1 hour.
Preheat the oven to 300 degrees F.
Shape the dough into 1-inch balls. Transfer the balls of dough to a baking sheet lined with parchment paper. Flatten each ball of dough with the bottom of a drinking glass. Using the end of a wooden spoon handle, poke a hole in the center of each. Brush the top of each cookie with egg white, and sprinkle with chocolate jimmies or with red, white, and green nonpareils.
Bake for 15-20 minutes. Transfer the cookies to a wire rack to cool.
Yield: 2 1/2 dozen
You can find the original version of this recipe here.
Linked to:
Recipe of the Week
Tasty Tuesdays
Titus 2 Tuesday
Family Fun Friday
Ring-shaped butter cookies like these are a popular holiday treat in Mexico. Typically, they are decorated with chocolate jimmies; however, red, white, and green nonpareils transform them into festive Christmas wreaths.
Here is the recipe I used:
Galletas de Mantequilla
1 1/2 cups flour
1/2 teaspoon baking powder
1/4 teaspoon kosher salt
8 tablespoons unsalted butter, softened
3/4 cup sugar
1 teaspoon vanilla extract
3 egg yolks
1 egg white, lightly beaten
chocolate jimmies
red, white, and green nonpareils
1/2 teaspoon baking powder
1/4 teaspoon kosher salt
8 tablespoons unsalted butter, softened
3/4 cup sugar
1 teaspoon vanilla extract
3 egg yolks
1 egg white, lightly beaten
chocolate jimmies
red, white, and green nonpareils
In a bowl, whisk together the flour, baking powder, and salt.
In a large bowl, mix together the butter, sugar, and vanilla until fluffy. Add the yolks one at a time, mixing well after each addition. Mix in the dry ingredients.
Chill the dough for 1 hour.
Preheat the oven to 300 degrees F.
Shape the dough into 1-inch balls. Transfer the balls of dough to a baking sheet lined with parchment paper. Flatten each ball of dough with the bottom of a drinking glass. Using the end of a wooden spoon handle, poke a hole in the center of each. Brush the top of each cookie with egg white, and sprinkle with chocolate jimmies or with red, white, and green nonpareils.
Bake for 15-20 minutes. Transfer the cookies to a wire rack to cool.
Yield: 2 1/2 dozen
You can find the original version of this recipe here.
Linked to:
Recipe of the Week
Tasty Tuesdays
Titus 2 Tuesday
Family Fun Friday
Friday, November 21, 2014
Candied Orange Peel
I made Candied Orange Peel today...not because I particularly wanted to make Candied Orange Peel, but because I wanted to make a recipe that called for candied orange peel as one of the ingredients. I could not find it in any store in my area. I did find European Candied Orange Peel on the Internet here, but I decided I wanted neither to pay $14.95 for 8 ounces plus the cost of shipping nor to wait days or weeks for it to arrive. So...make Candied Orange Peel, I did!
I found these two recipes on the Internet:
Food Network
Bright-Eyed Baker
Here is the recipe I used:
1 1/2 cups sugar
3/4 cup water
additional sugar (to coat)
1. Rinse the oranges.
2. Cut off the top and bottom of each orange. Score the skin into quarters.
3. Remove the skin (peel and pith). Cut the skin into strips about 1/8-inch
wide. (Refrigerate the oranges for another use.)
4. Place the strips of peel in a large saucepan and cover with cold water.
5. Bring to a full boil on high heat.
6. Drain the water from the strips of peel.
7. Repeat steps 4-6 two more times.
8. In a medium saucepan, whisk together the 1 1/2 cups of sugar and 3/4 cup
of water. Bring to a simmer.
9. Let the mixture cook for 8-9 minutes at a constant simmer.
10. Add the strips of peel and cook for 45-60 minutes at a constant simmer,
without stirring. (If necessary, swirl the pan to make sure all of the strips
of peel get covered with the syrup.) At the end of the cooking time, the
strips of peel will be translucent.
11. Drain any remaining syrup.
12. Spread the strips of peel on a drying rack. Allow them to dry for 4-5 hours.
13. Cut the strips of peel into small pieces and toss with additional sugar to
coat.
14. Store the Candied Orange Peel in an airtight container.
Yield: approximately 2 1/2 cups
The aroma of the cooking orange peel is lovely! :)
Linked to:
Best Recipes & DIY Projects
Tasty Tuesdays
Titus 2 Tuesday
Fun Food Friday
Family Fun Friday
I found these two recipes on the Internet:
Food Network
Bright-Eyed Baker
Here is the recipe I used:
Candied Orange Peel
3 navel oranges1 1/2 cups sugar
3/4 cup water
additional sugar (to coat)
1. Rinse the oranges.
2. Cut off the top and bottom of each orange. Score the skin into quarters.
3. Remove the skin (peel and pith). Cut the skin into strips about 1/8-inch
wide. (Refrigerate the oranges for another use.)
4. Place the strips of peel in a large saucepan and cover with cold water.
5. Bring to a full boil on high heat.
6. Drain the water from the strips of peel.
7. Repeat steps 4-6 two more times.
8. In a medium saucepan, whisk together the 1 1/2 cups of sugar and 3/4 cup
of water. Bring to a simmer.
9. Let the mixture cook for 8-9 minutes at a constant simmer.
10. Add the strips of peel and cook for 45-60 minutes at a constant simmer,
without stirring. (If necessary, swirl the pan to make sure all of the strips
of peel get covered with the syrup.) At the end of the cooking time, the
strips of peel will be translucent.
![]() |
| Cooking |
11. Drain any remaining syrup.
12. Spread the strips of peel on a drying rack. Allow them to dry for 4-5 hours.
![]() |
| Drying |
13. Cut the strips of peel into small pieces and toss with additional sugar to
coat.
![]() |
| Done! |
14. Store the Candied Orange Peel in an airtight container.
Yield: approximately 2 1/2 cups
The aroma of the cooking orange peel is lovely! :)
Linked to:
Best Recipes & DIY Projects
Tasty Tuesdays
Titus 2 Tuesday
Fun Food Friday
Family Fun Friday
Thursday, November 20, 2014
Anzac Biscuits
I made Anzac biscuits today.
There are many recipes for Anzac biscuits on the Internet. Here is the recipe I used:
1 cup rolled oats
1 cup all-purpose flour
3/4 cup sugar
3/4 cup shredded coconut
1/2 cup butter
4 teaspoons light corn syrup
2 teaspoons molasses
1/2 teaspoon baking soda
1 tablespoon boiling water
Preheat oven to 325 degrees F.
In a large bowl, combine the oats, flour, sugar, and coconut.
In a saucepan, melt the butter, corn syrup, and molasses. In a measuring cup, mix the baking soda with boiling water and add immediately to the butter mixture. Add the butter mixture to the dry ingredients and stir to mix thoroughly.
Grease a baking sheet or line with parchment paper. Place a spoonful (approximately 1 tablespoon) of the dough 2 inches apart on the baking sheet.
Bake for 15 minutes. Remove from the oven. Remove from the baking sheet to a rack to cool.
Yield: 2 1/2 dozen
Mmmm...delicious!! ~Crispy and chewy, both at the same time!
You can find the original version of this recipe here.
*source: Wikipedia
Linked to:
An Anzac biscuit is a sweet biscuit popular in Australia. Anzac biscuits have long been associated with the Australian and New Zealand Army Corps (ANZAC) established in World War I.
Anzac biscuit recipes omitted eggs because of the scarcity of them during the war. It has been claimed the biscuits were sent by wives to soldiers abroad because the ingredients did not spoil easily and the biscuits kept well during naval transportation.*
There are many recipes for Anzac biscuits on the Internet. Here is the recipe I used:
Anzac biscuits
1 cup rolled oats
1 cup all-purpose flour
3/4 cup sugar
3/4 cup shredded coconut
1/2 cup butter
4 teaspoons light corn syrup
2 teaspoons molasses
1/2 teaspoon baking soda
1 tablespoon boiling water
Preheat oven to 325 degrees F.
In a large bowl, combine the oats, flour, sugar, and coconut.
In a saucepan, melt the butter, corn syrup, and molasses. In a measuring cup, mix the baking soda with boiling water and add immediately to the butter mixture. Add the butter mixture to the dry ingredients and stir to mix thoroughly.
Grease a baking sheet or line with parchment paper. Place a spoonful (approximately 1 tablespoon) of the dough 2 inches apart on the baking sheet.
Bake for 15 minutes. Remove from the oven. Remove from the baking sheet to a rack to cool.
Yield: 2 1/2 dozen
Mmmm...delicious!! ~Crispy and chewy, both at the same time!
You can find the original version of this recipe here.
*source: Wikipedia
Linked to:
Subscribe to:
Posts (Atom)


