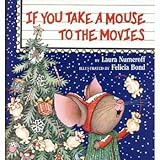
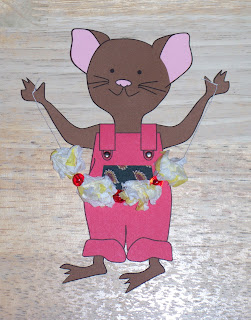
If you take a mouse to the movies, he'll ask you for some popcorn. When you give him the popcorn, he'll want to string it all together. Then he'll want to hang it on a Christmas tree.T made a cut-and-paste mouse ornament, complete with a string of popcorn! :)
~from If You Take a Mouse to the Movies
(A photo of T's ornament is forthcoming!)
Supplies:
- card stock: brown, pink, and red
- scissors
- glue
- two silver brads
- tissue paper: white and yellow
- red round beads*
- white embroidery floss or thread
- plastic needle*
- hole punch
- hemp cord (for hanging)
Print the mouse at 35%: page 1 (head and feet) onto brown and pink card stock, page 2 (arms) onto brown card stock, and page 3 (overalls) onto red card stock. (Alternative: Print the mouse onto white card stock and color the pieces. Most of the time, T is not overly-fond of coloring...so I went with the colored card stock.)
Cut out the pieces, except cut out only the nose and inner ears of the face printed on the pink card stock.
Glue the pieces together to form a mouse; use the pink nose and inner ears to piece onto the brown face. Add the brads to the overalls to resemble buttons. (We also added a piece of fabric for the pocket on the front of the overalls.)
Scrunch pieces of white and yellow tissue paper (to resemble popcorn). String the "popcorn" and "cranberries" (red beads) to make a short garland. Secure the ends to the mouse's hands. (I made a tiny hole, threaded the end of the piece of floss through it, and tied a knot around the mouse's hand.)
(Alternative: Use real popcorn. I chose not to use real popcorn; I want to save the ornament...without attracting a bug or varmint while it's in storage!)
Punch a hole near the top of the ornament, add a loop of hemp cord, and hang it on your Christmas tree! :)
Linked to:
Christmas Ornament Party
Christmas Craft Party
12 Days of Christmas Party
Love Books
Shine on Fridays
Virtual Book Club for Kids


That is so cute! What an adorable idea.
ReplyDeleteThanks for sharing! :]
Love it. Really enjoyable crafts you have here! Linda
ReplyDeleteHi! These are so adorable! I'm making these for a class of first graders. Question: What did you use at the top of the mouse head to secure the hemp cord?
ReplyDeleteThank you, Ellie!
DeleteAfter I punched the hole near the top of the ornament, I inserted a bronze-colored eyelet. Then, I used a little hammer and a metal crimping tool (scrapbooking tools) to "open" and secure the back of the eyelet to the ornament. I think if you copy the following into your browser, it will bring up a photo of eyelets and a crimping tool:
https://www.google.com/search?q=eyelet+crimp+metal+tool&espv=210&es_sm=93&tbm=isch&tbo=u&source=univ&sa=X&ei=mQ2zUsrZC6iiyAH3xoGoAw&ved=0CC8QsAQ&biw=1600&bih=767#facrc=_&imgdii=_&imgrc=v-PVOhP0QMM47M%3A%3ByulfpqsIuLuH_M%3Bhttp%253A%252F%252Fi.imgur.com%252FLwBPF.jpg%3Bhttp%253A%252F%252Fmusic-electronics-forum.com%252Ft28453%252F%3B1280%3B853
You can find little packets of eyelets in the "findings" area of the scrapbooking section of a store like Hobby Lobby.
Have fun making your mice! :)
This is so sweet! Thank you so much for linking up to the Virtual Book Club for kids featuring Laura Numeroff this month!
ReplyDelete