Tuesday, December 18, 2012

Ho Ho Ho!

We went to the mall this afternoon so T could sit on Santa's lap!


Santa gave T a gingerbread man cookie.  ~Sweet!  :)

Monday, December 17, 2012

Living Christmas Tree

We went to hear The Living Christmas Tree performance this evening.


I discovered some interesting facts about this tree.


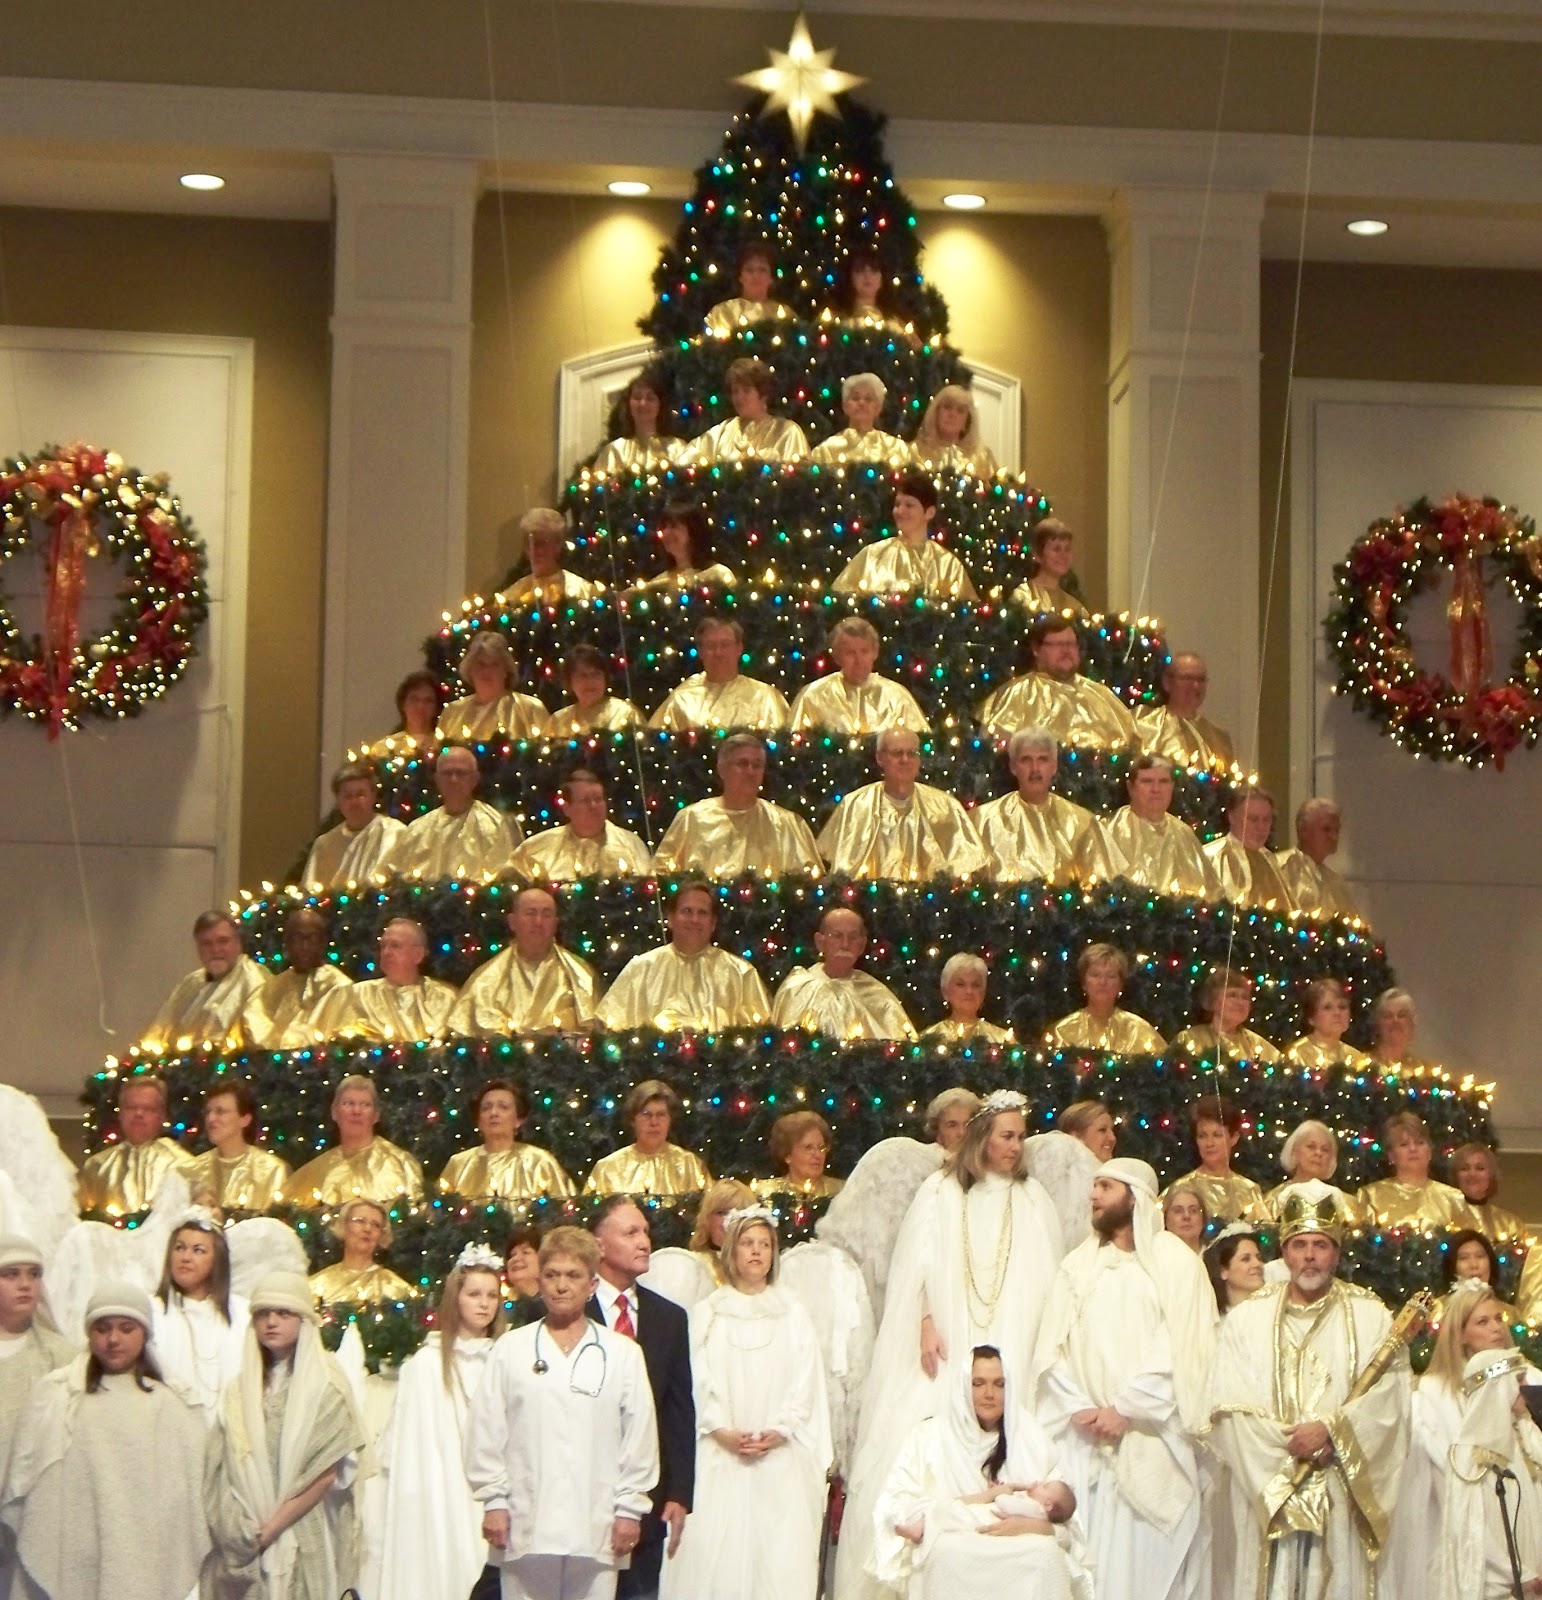
The "Living Christmas Tree" is constructed of 4,000 pounds of steel and plywood flooring.  It stands 35½ feet from the floor to the tip of the star. Over a mile of electrical wiring is used in lighting the 35,000 bulbs in five colors.  Fifteen hundred feet of artificial greenery is on the tree.  The tree weighs more than 10 tons when loaded with adult singers.

The music was wonderful; we all were glad we attended.  :)

Thursday, December 13, 2012

Rudolph the Red-Nosed Reindeer

Today we read Rudolph the Red-Nosed Reindeer as adapted by Rick Bunsen and made a Rudolph ornament.

Product Details

Rudolph is a reindeer with a glowing nose.  When the other reindeer make fun of him, Rudolph runs away.  Hermey, a misfit elf, and Yukon Cornelius, a prospector, help Rudolph learn that he shouldn't run away from his problems.  Rudolph returns to the North Pole and discovers that Santa desperately needs his help!


T loves this story.  We have the DVD, also, which T watches all year long!  
;o)
          Rudolph, the red-nosed reindeer
          had a very shiny nose.
          And if you ever saw him,
          you would even say it glows.
Working as an advertising executive, Robert May had a natural flair with words and was able to compose the Rudolph the Red-Nosed Reindeer poem which was specifically designed to appeal to children.  This marketing ploy was a massive success, and approximately 2.5 million poems were given away in the first year of its publication.
In 1949, singer Gene Autry recorded a musical version of Rudolph the Red-Nosed Reindeer, composed by Johnny Marks.
T made a Rudolph ornament from craft sticks.


Supplies:

  • three craft sticks
  • brown paint
  • paintbrush
  • glue
  • wiggly eyes
  • red pom-pom
  • hemp cord (for hanging)

Directions:

Paint the craft sticks brown.  Allow them to dry thoroughly.

Glue together two crafts sticks to form a "V" shape.  Glue the third craft stick on top of the "V" and close to the top* of the "V" to form a triangle.  *Allow approximately an inch of the top of the "V" to stick up (to resemble antlers).  Allow the ends of the third craft stick to stick out beyond the "V" (to resemble ears).


Glue a red pom-pom to the tip of the "V" (for the nose).


Glue two wiggly eyes to the "V" below the third craft stick.


Glue a piece of hemp cord to the top back of the ornament.  Let it dry thoroughly, and then hang the ornament on your Christmas tree!  :)


My inspiration for the ornament:
   DLTK
   The Ramblings of a Crazy Woman

Linked to:
   Christmas Ornament Party
   Christmas Craft Party
   12 Days of Christmas Party
   Read Explore Learn
   Read-Aloud Thursday
   The Children's Bookshelf
   Love Books
   Mom's Library
   Learn & Link
   Link & Learn
   For the Kids Friday

   T.G.I.F. Party
   Shine on Fridays
   Show-and Share Saturday
   Show & Tell
   Tip-Toe Thru Tuesday
   Enchanted Thursdays
   Clever Chicks
   Pin Me Party

Tuesday, December 11, 2012

Picture Time

T brought the camera to me yesterday and asked me to take his picture.  Now that doesn't happen very often!  I was happy to oblige.  ;o)

Here he is...in front of "his" Christmas tree.  :)


Monday, December 10, 2012

O Little Town of Bethlehem

Today we read O Little Town of Bethlehem by David Mead and Chris Sharp and made a town of Bethlehem ornament.

Product Details
O little town of Bethlehem
how still we see thee lie.
Above thy deep and dreamless sleep
the silent stars go by.

~from O Little Town of Bethlehem
This board book features instrumental music and lights.  The Christmas carol, "O Little Town of Bethlehem," plays and stars light up when the cover is opened.  The story of the first Christmas is presented very simply.

T made a town of Bethlehem CD ornament.


Supplies:
  • bright yellow card stock
  • scissors
  • CD
  • glue
  • ribbon (for hanging)

Directions:

Print the town of Bethlehem, and cut it out.


Glue the picture to the center of the back of the CD.

Front of the ornament =
Back of the CD

Glue a yellow circle to the front of the CD, catching the ends of a piece of ribbon under the edge.

Back of the ornament =
Front of the CD

Let it dry thoroughly, and then hang the ornament on your Christmas tree!  :)


Linked to:
   Christmas Ornament Party
   Christmas Craft Party
   12 Days of Christmas Party
   Focus on the Nativity
   Love Books
   T.G.I.F. Party #57
   Shine on Fridays
   Clever Chicks #12
   Pin Me Party #10

Friday, December 7, 2012

The Polar Express

T was so excited to go to the book store tonight...


to hear a reading of the book, The Polar Express by Chris Van Allsburg.


While we waited, T looked at books.


Finally...it was time for the story!


One of the book store employees read it to us.


T listened carefully, as did his papa.  :)


Afterward, each of us was given a cookie from the in-store cafe...


a yummy sugar cookie!


It was an enjoyable holiday event for our family.


Did you notice that T wore his train hoodie (and long-sleeved t-shirt) in celebration of the occasion?  
;o)

Tuesday, December 4, 2012

A Winter Secret

This afternoon, T and I went to a book store to hear an author read a Christmas poem she wrote.

Dawn Watkins
author

She's written a number of books; however, this poem is not available in book form....It was made into a movie.


Product Details
A Winter Secret
DVD

Afterward, T received an ornament which the author personalized and autographed.


                                Tanasee could not
                                close the door now,
                                For wonder.
                                It was no tree at all,
                                Swaying on the high hill.
                                It was a great stag...

                                ~from A Winter Secret

Then, T had the opportunity to make an ornament with materials the book store provided.  There was a display of five different ornaments, and T was allowed to choose which one he wanted to make.  He *We* chose the ornament that most closely resembled the story line of the poem.  T did a great job...


and was pleased with the outcome!  
;o)


Saturday, December 1, 2012

This Is the Star

Today we read This Is the Star by Joyce Dunbar and made a star ornament.

Product Details
This is the star in the sky.
~from This Is the Star
This retelling of the Nativity story is written as a simple, cumulative poem describing the holy night.

The illustrations are stunning oil paintings.


T made a Christmas star ornament from craft sticks.


I provided lots of embellishments, but T wanted only to use the gold sequins to decorate his star!

Supplies:

  • six yellow-colored craft sticks
  • glue
  • gold cord
  • gold acrylic jewels, gold sequins, yellow and gold buttons, yellow and gold beads

Directions:

Glue together three craft sticks to form a triangle.  Catch the ends of a piece of gold cord between the ends of two of the craft sticks (to form a loop for hanging).


Glue together the other three craft sticks to form another triangle.


Glue one triangle on top of the other to form a Star of David.


Decorate the star!


Let it dry thoroughly, and then hang the ornament on your Christmas tree!  :)


My inspiration for the ornament:
   Activity Village

Linked to:
   Christmas Ornament Party
   Christmas Craft Party
   12 Days of Christmas Party
   Read Explore Learn
   Love Books
   T.G.I.F. Party #56 (Living Life Intentionally)
   Shine on Fridays
   Clever Chicks #11
   Pin Me Party #9